

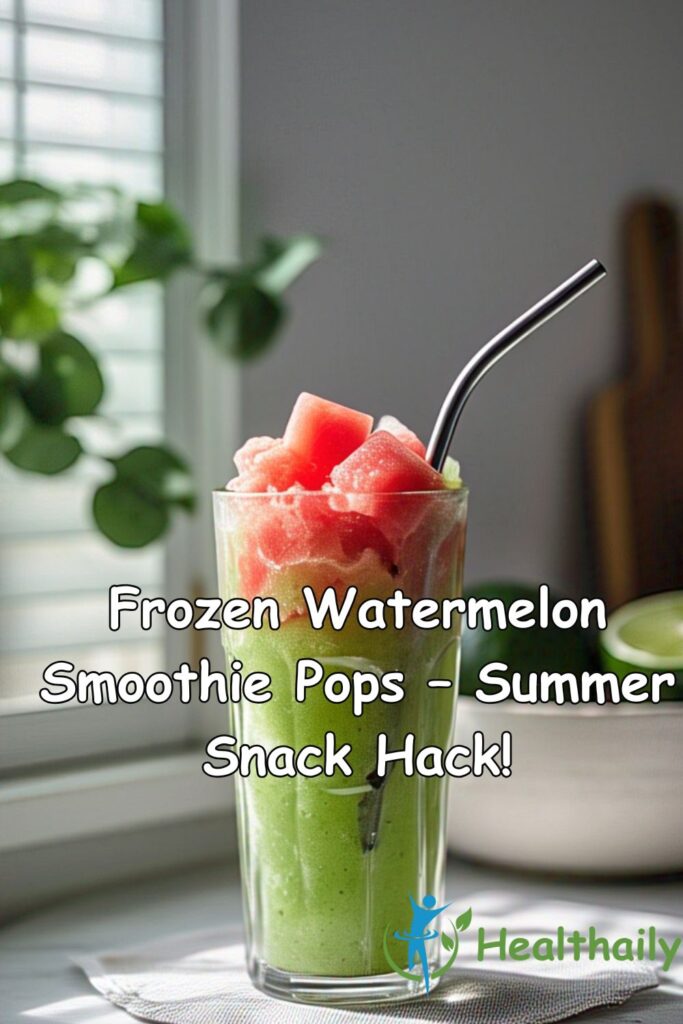
Summer is hot. You feel sticky. You want something cold, quick, and healthy. You open the freezer. You grab a frozen watermelon smoothie pop. It cools you down. It tastes like a treat. It helps you stay hydrated. This is the snack that saves summer.
In this article, I show you how to make frozen watermelon smoothie pops with just a few ingredients. I also explain why they are better than store-bought popsicles. I keep every step simple. You don’t need fancy tools. You just need fruit, a blender, and a freezer. Let’s start.
Why Watermelon Is the Star of Summer
Watermelon is more than just sweet and juicy. It is mostly water, around 92%. That makes it great for hydration. It also has vitamins like A, B6, and C. It gives you electrolytes like potassium. It helps your body stay cool and refreshed.
Watermelon is also low in calories. You can enjoy a lot of it without worrying about your weight. Its texture makes it perfect for blending and freezing. When you turn it into a smoothie pop, it keeps its flavor and gives you a soft frozen bite.
What Makes These Pops a Smart Snack?
Store-bought popsicles are full of sugar and artificial colors. They look good but don’t offer much nutrition. Frozen smoothie pops are different. You make them with real fruit. You control the sugar. You keep it clean and healthy.
These pops are:
- Hydrating
- Low in calories
- Free of added chemicals
- Kid-friendly
- Fun to make
You also save money. You can buy one watermelon and make a whole batch. You can even add leftover fruit you already have.
What You Need for Frozen Watermelon Smoothie Pops
These pops need just three to five ingredients. You probably already have most of them.
Basic Ingredients
- Watermelon (3 cups, cubed) – The base. Fresh or pre-cut.
- Lime Juice (2 tablespoons) – Adds a tangy boost.
- Honey or Maple Syrup (1 tablespoon, optional) – For added sweetness if needed.
Optional Add-Ins
- Mint Leaves (a few fresh leaves) – For a cooling effect.
- Greek Yogurt (¼ cup) – For creaminess and protein.
- Coconut Water (¼ cup) – For added hydration.
- Strawberries or Pineapple (½ cup) – For variety.
You can mix and match. Just make sure the watermelon stays the main part.

Equipment You’ll Need
- A sharp knife
- Cutting board
- Blender
- Popsicle molds or small cups with sticks
- Freezer
If you don’t have molds, you can use paper cups or ice cube trays with toothpicks.
Step-by-Step Instructions

Step 1: Cut and Freeze the Watermelon First (Optional)
If you want a thicker smoothie texture, freeze the watermelon cubes for 2 hours first. This helps the pops set faster and taste more like a sorbet.
Step 2: Blend Everything
Add watermelon cubes to the blender. Squeeze in the lime juice. Add honey if you like. Add yogurt or coconut water if you want a creamy version.
Blend until smooth. It should pour easily, but not be too runny. If it’s too thick, add a bit more liquid. If too thin, add some frozen fruit or more watermelon.
Step 3: Taste and Adjust
Taste the mixture before freezing. Adjust sweetness or tang if needed. You can add more lime or honey depending on your preference.
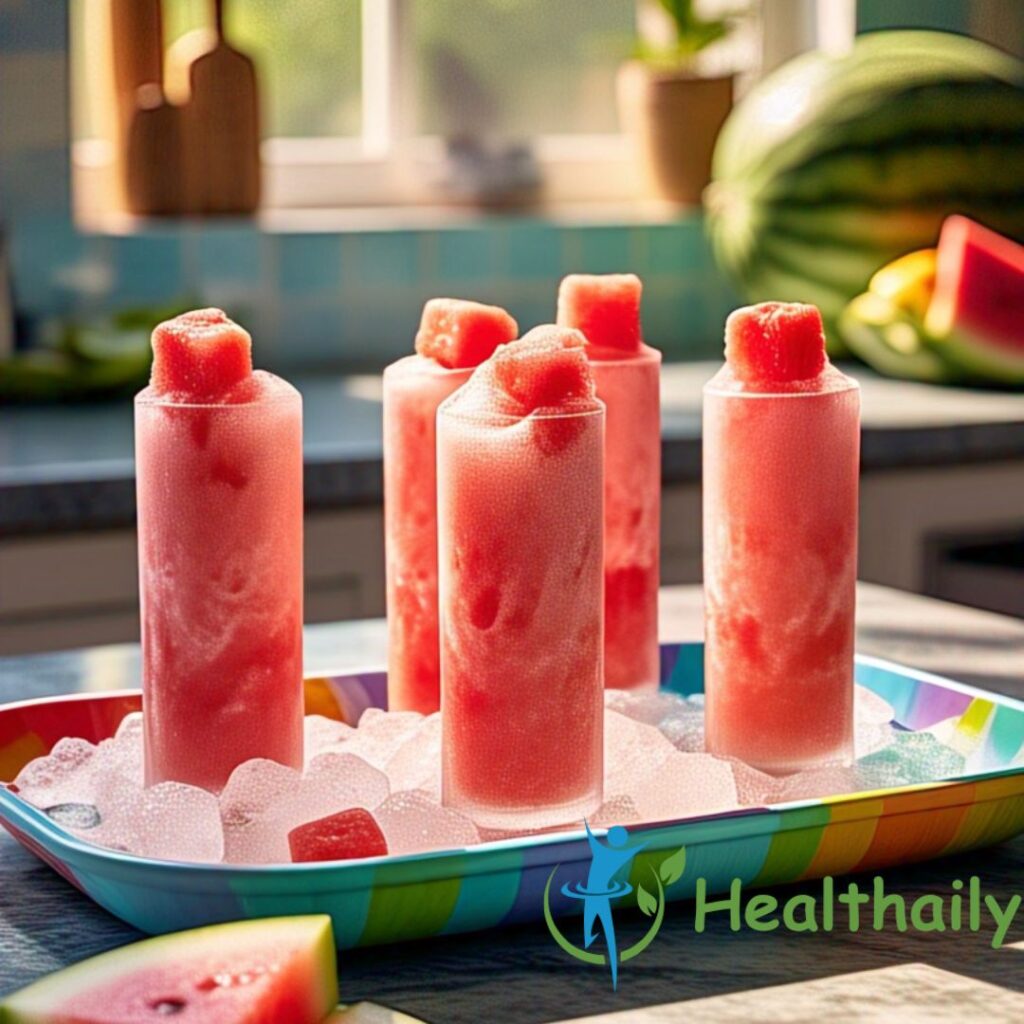
Step 4: Pour into Molds
Carefully pour the mixture into popsicle molds. Leave a little space at the top so they can expand as they freeze.
Add sticks and tap the molds gently on the counter to remove air bubbles.
Step 5: Freeze
Place molds in the freezer. Freeze for at least 4–6 hours. Overnight is best for a solid pop.
Step 6: Release the Pops
To remove the pops easily, run the mold under warm water for 10–15 seconds. Pull gently. Don’t twist too hard or they might break.
How to Store and Serve Smoothie Pops
After removing from the molds, you can store them in a freezer bag or airtight container. Use parchment paper between them to prevent sticking.
Serve straight from the freezer on hot days. They melt slowly and stay flavorful. Perfect for kids, guests, or just you after a workout.
Flavor Variations to Try
You can keep it interesting by changing one or two ingredients. Here are some easy ideas:
1. Watermelon-Mint
Add 4–5 fresh mint leaves. Blend them in for a cool, fresh taste.
2. Watermelon-Coconut
Use coconut water instead of plain water. It adds minerals and a smooth texture.
3. Watermelon-Strawberry
Add frozen strawberries. It makes the color brighter and the flavor bolder.
4. Watermelon-Yogurt Swirl
Pour plain yogurt into molds first. Then add blended watermelon. Swirl with a stick for a marble look.
5. Watermelon-Lime-Pineapple
Mix in chunks of pineapple. It blends well with lime and adds a tropical twist.

Download The 21-Day Smoothie Diet Right Now!
How Many Pops Does This Make?
Using 3 cups of watermelon usually gives you 6 to 8 pops, depending on mold size. You can double the recipe for more. Always leave space at the top of the mold.
Why This Works for Busy People
These pops are perfect for those with little time. You can blend once, freeze, and snack all week. There’s no cooking. No cleanup beyond a blender. It takes 10 minutes to prep. You just need to wait for them to freeze.
They are easy to grab and go. They work as a:
- Morning boost
- Afternoon pick-me-up
- Post-workout snack
- Kid’s summer treat
Nutrition Benefits at a Glance
Here’s a rough breakdown per pop (without yogurt or extra fruit):
- Calories: ~40–50
- Sugar: Natural from fruit
- Fiber: 1–2 grams
- Vitamin C: High
- Water content: Over 90%
- Fat: 0 (unless yogurt added)
These pops are refreshing without making you feel heavy. They hydrate and satisfy sweet cravings.
Can You Make Them Ahead?
Yes. These smoothie pops can last in the freezer for up to 2 months. Just keep them sealed well. Label them with the date. You can make several batches at once and rotate flavors weekly.
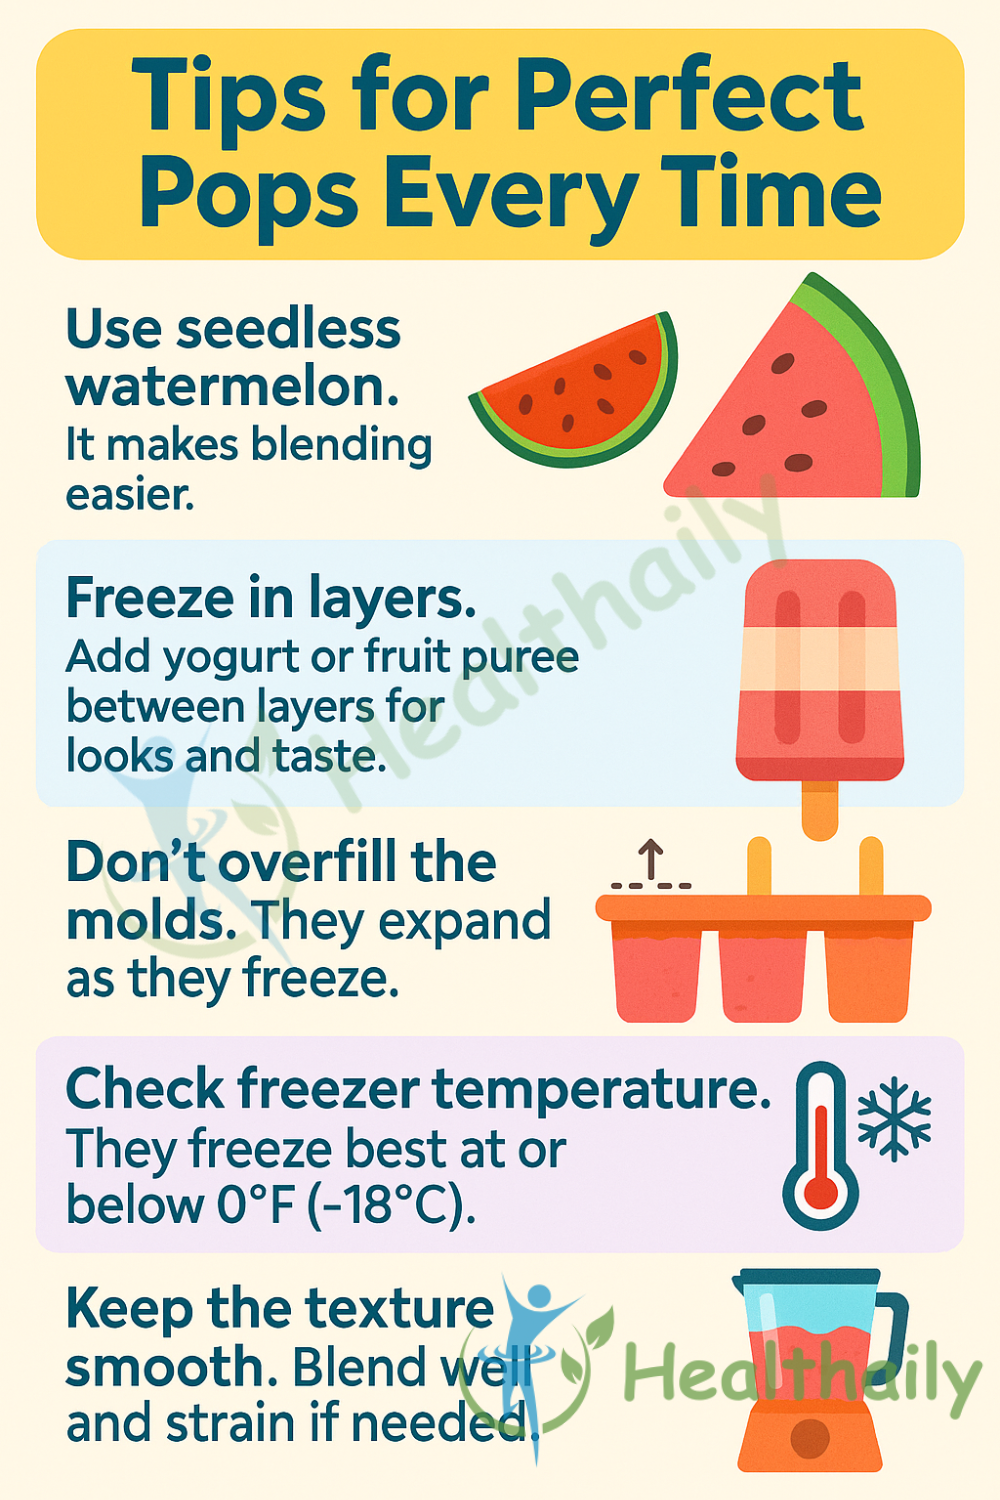
Smart Tips for Perfect Pops Every Time
- Use seedless watermelon. It makes blending easier.
- Freeze in layers. Add yogurt or fruit puree between layers for looks and taste.
- Don’t overfill the molds. They expand as they freeze.
- Check freezer temperature. They freeze best at or below 0°F (-18°C).
- Keep the texture smooth. Blend well and strain if needed.
Download below infographic for future use
What to Do If You Don’t Have Popsicle Molds
You can still make them. Use:
- Small plastic or paper cups
- Ice cube trays
- Muffin tins
Insert wooden sticks, plastic spoons, or even straws. Cover with foil and poke the stick through the middle to hold it in place.
Are These Good for Weight Loss?
Yes. These smoothie pops are low in calories and sugar. They replace higher-calorie snacks like chips or ice cream. They also keep you hydrated, which helps with hunger control. The fiber in fruit helps you feel full longer.
If you add Greek yogurt or chia seeds, they also give you some protein and healthy fat. That balances your energy levels and supports healthy snacking.
Can Kids Eat These?
Absolutely. Kids love the bright color and the sweet taste. You love that they get vitamins and no artificial stuff. You can even let them help make the pops. Let them pick the fruits and help blend. It becomes a fun family activity.
Final Thoughts
Frozen watermelon smoothie pops are more than just a snack. They are a simple solution to summer cravings. They are fresh, light, and easy to make. You don’t need much time or money. You just need real fruit and a freezer.
Make a batch. Freeze them. Eat one when the sun gets too hot. You’ll feel cool, refreshed, and satisfied. That’s the summer snack hack you didn’t know you needed.